

せっかく家を建てたけど、標準仕様の洗面台がいまいちだなぁ…
 ねこ
ねこ私は古くなった洗面台をどうにかしたいよ〜
リメイクシートを使ったり、取っ手を付け替えれば簡単にデザインを変えられますよ♬
今回はわが家の実例やDIYのコツ・おしゃれなリメイクシートや取っ手のおすすめをご紹介します!
 ねこ
ねこ洗面台のデザインを変えたくて悩んでいる人は必見です♬
\これを読んだらすぐにDIYしてみたくなること間違いなし!/
リメイクシートで洗面台DIY!購入したものはこちら
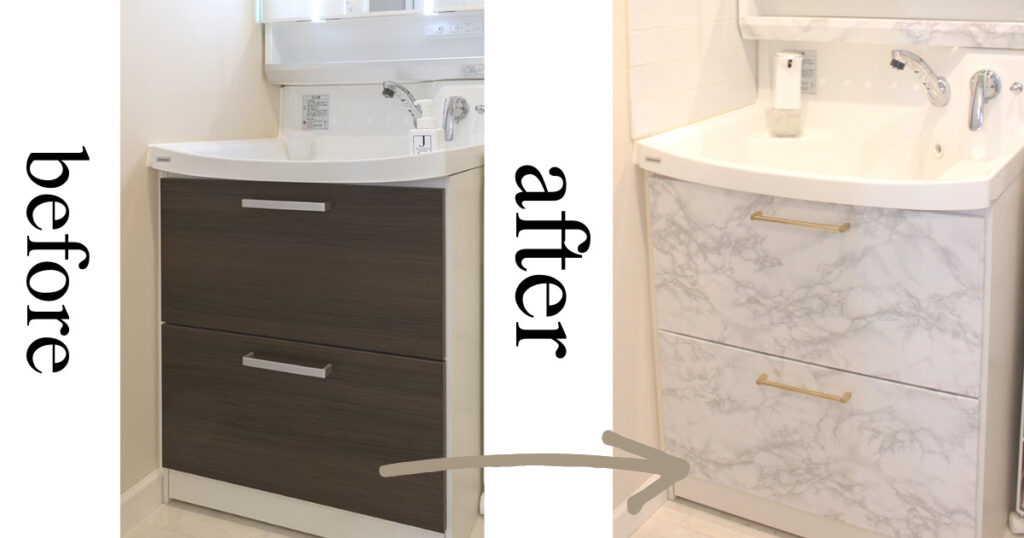
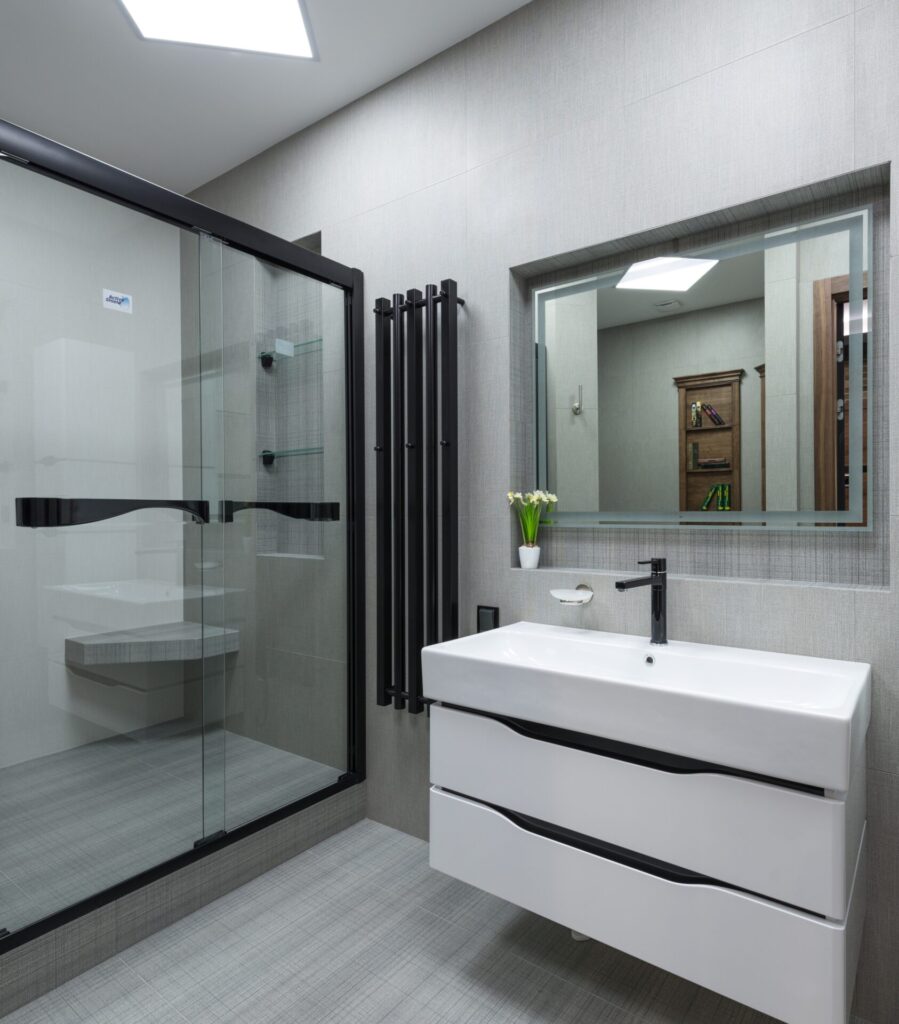
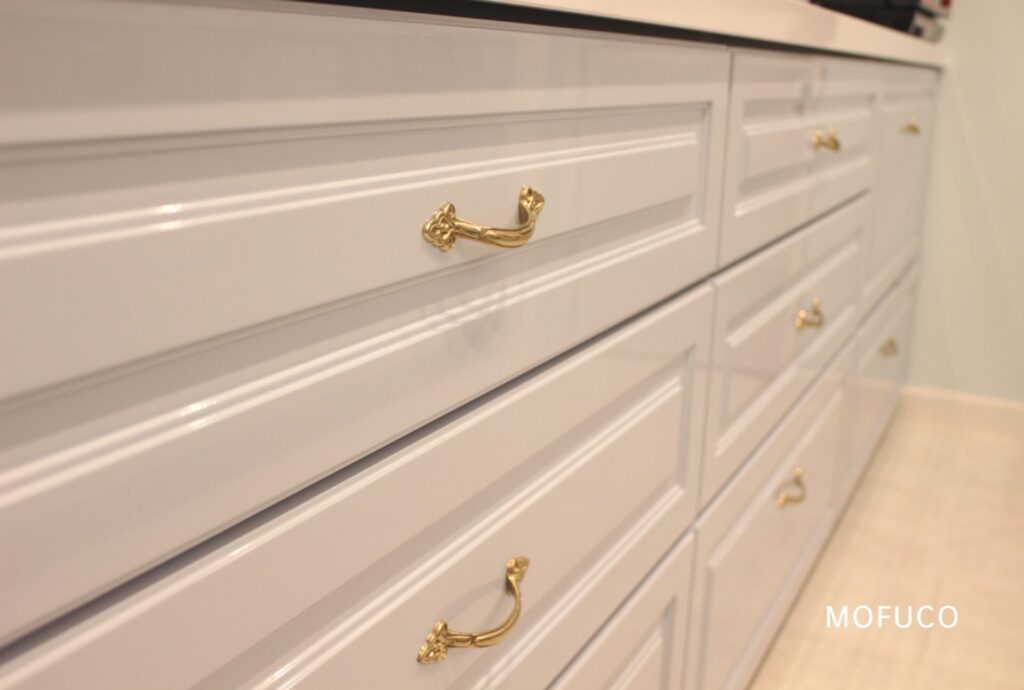
こちらが、わが家の洗面台(クリナップ)です。
家づくり当初は何も考えず、「木目にしておけば大体何にでも合うだろう」と軽い気持ちで選んだこのデザイン。
好みによってはビフォーの方がお好きな方もいるかと思いますが、わが家は全体的に白っぽいインテリアなので、ここだけ濃い色が浮いているのが気になりました。

ということでさっそく、リメイクシートとおまけに取っ手も購入してDIYしちゃいましたよー!
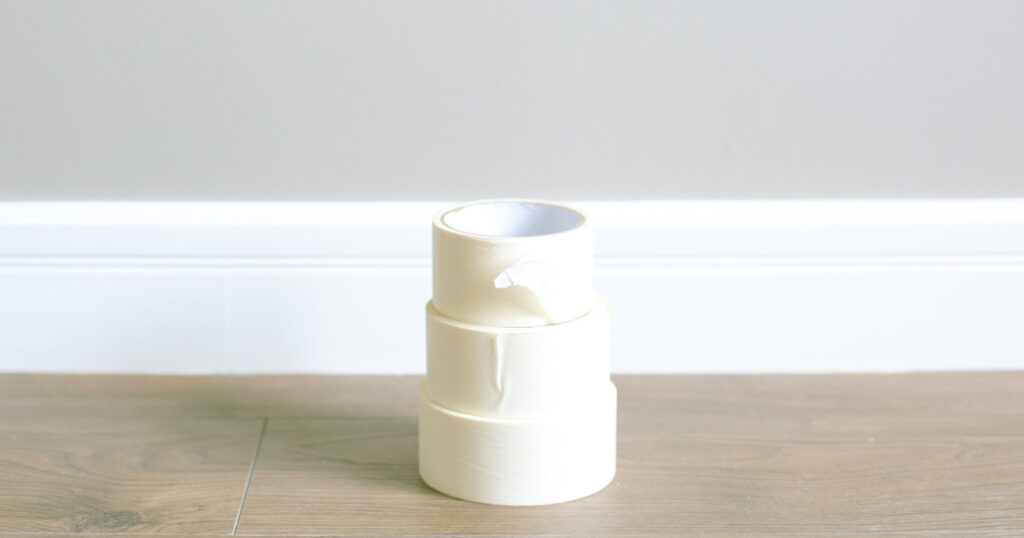
おしゃれなリメイクシートを楽天で購入【洗面台DIY】
私が今回購入したリメイクシートはこちらです。
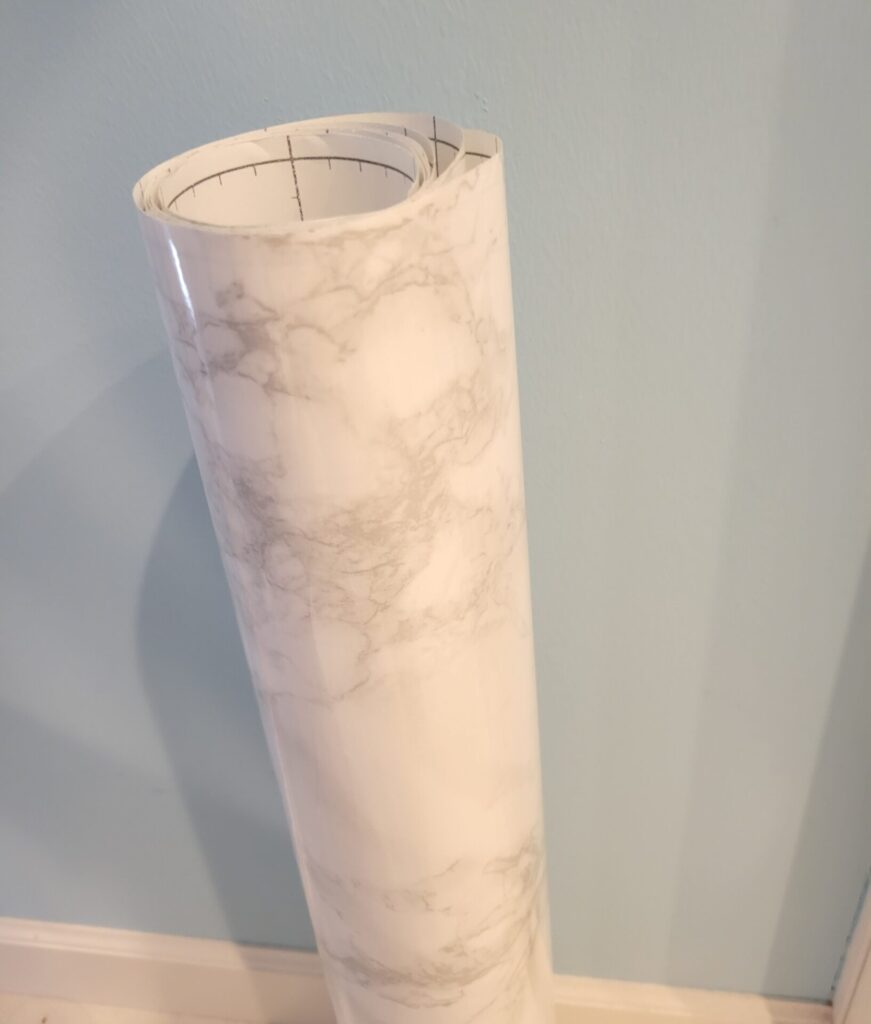
低価格なのに高級感があってとても良かったです。
以前100円ショップのリメイクシートも何度も試したことがありますが、今回買った壁紙屋本舗さんのシートはやっぱり素材が全然違います。
数百円の違いなのに仕上がりが歴然の差になりました。
シワや気泡も入りにくく貼りやすかったですよ。
\こちらを購入しました/

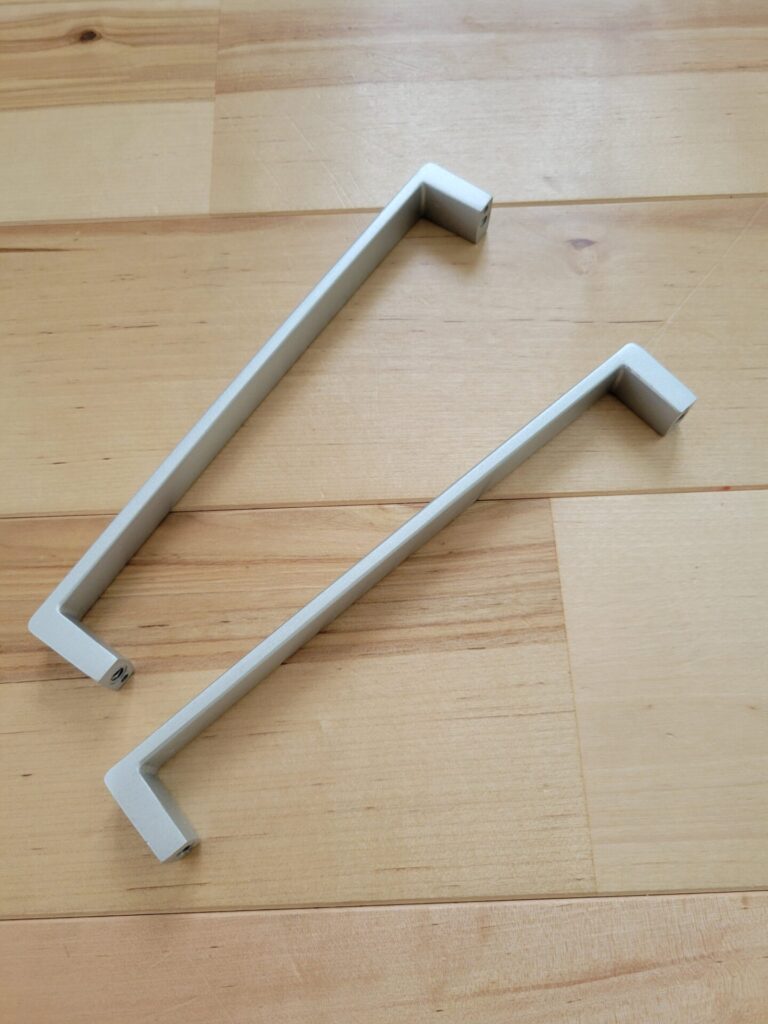
真鍮の取っ手に付け替えると一気に高級感!【洗面台DIY】
そして、取っ手はこちらの真鍮(しんちゅう)製のものにしました。

少々値は張りますが、真鍮の取っ手を付けると一気に高級感が出るのですごく気に入っています!
ネジで取り付けるだけなので気軽に替えられて印象がガラッと変わりますよ。
\こちらを購入しました/

さっそくリメイクシートを貼ってみよう!…その前に。
 ねこ
ねこよし!そしたらリメイクシートをさっそく貼りたいな!

ちょっと待って!
その前に、事前にやっておくといいことを3つご紹介します。
1.道具の準備
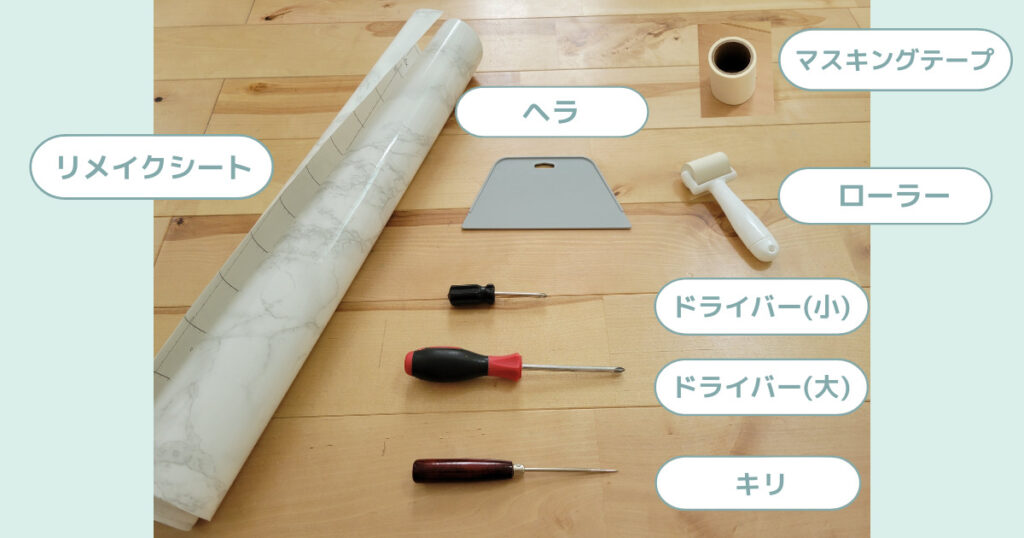
まずは必要な道具の準備から。
私が用意したものは以下の6点です。代用できる物があれば似たような物でもいいと思います。
- リメイクシート
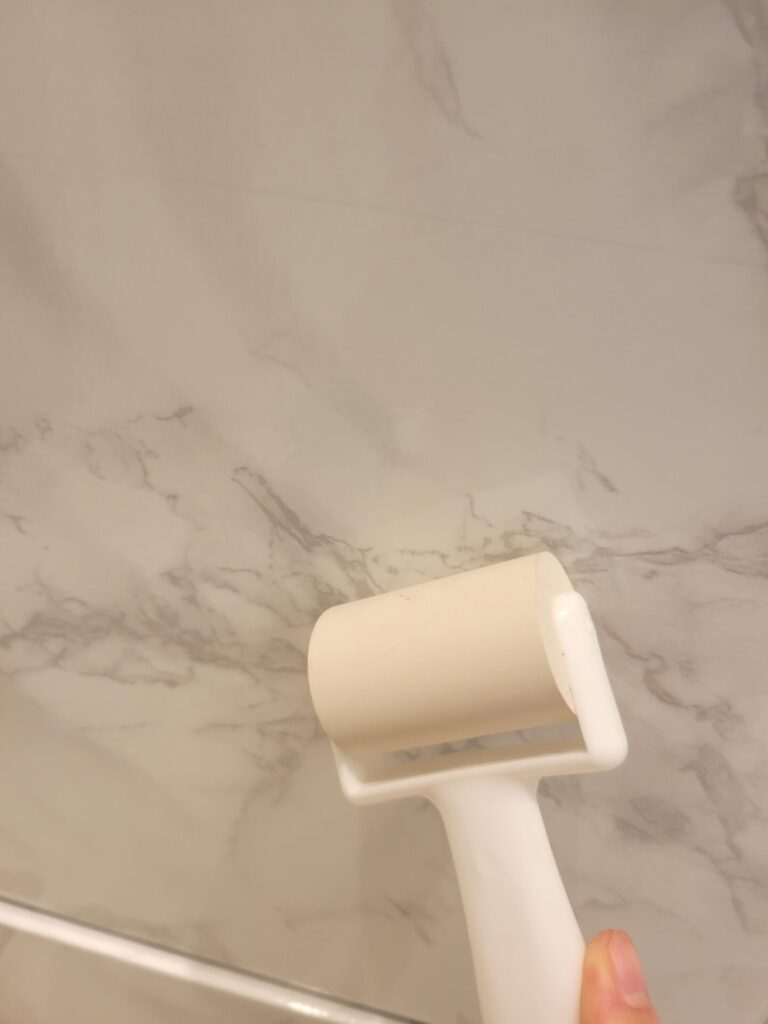
- リメイクシートを貼るヘラ
- リメイクシートを貼るローラー
- マスキングテープ
- 取っ手を付け外すためのドライバー(一応 大・小用意しました)
- ネジ穴を開けるためのキリ
道具は100円ショップで用意しました。
2.事前に取っ手を外しておく
ドライバーで取っ手を事前に外しておきます。
取っ手を変えない場合も、一度外しておいた方がリメイクシートが綺麗に貼れて仕上がりがよくなりますよ。
3.幅広のマスキングテープを貼って原状回復用に保護
私は念のため、原状回復できるようにリメイクシートを貼る前に、マスキングテープで貼る箇所全面を覆いました。
幅広のマスキングテープを貼った上からリメイクシートを貼れば、あとからやり直したい時や賃貸の場合も安心ですよ。
おすすめはカモ井のこちらのテープです。

普通のマスキングテープだと細くて貼るのが大変なので、幅広タイプを用意してくださいね。
リメイクシートを貼る手順【洗面台DIY】
では、事前準備ができたところでさっそく貼っていきましょう。

ここからは3ステップで、私が貼った時の手順をご紹介します。
シワにならないように慎重に。
ここで貼ったマスキングテープによって仕上がりが変わってきます。
綺麗な仕上がりにするには、ヘラやローラーなどの道具は必須!
100円ショップでいいのでぜひ用意してくださいね。
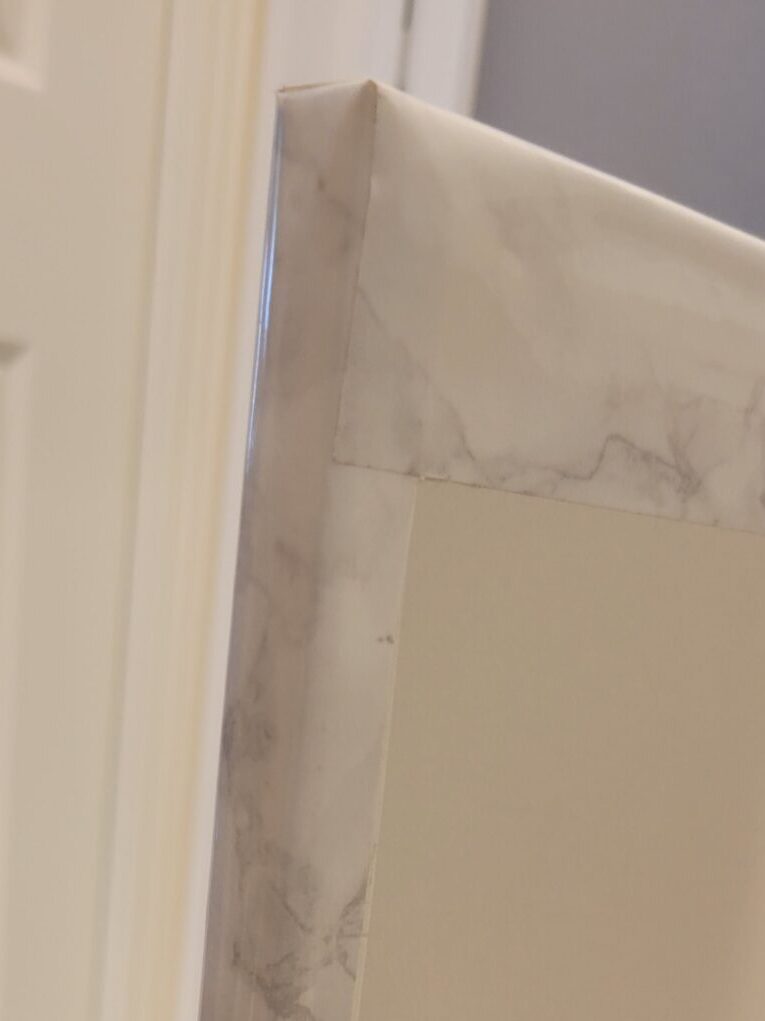
最後に端の処理です。
そのまま切ってしまうと見た目が悪くなってしまうので、端は長めに取って折り込みましょう。
綺麗な仕上がりになります。

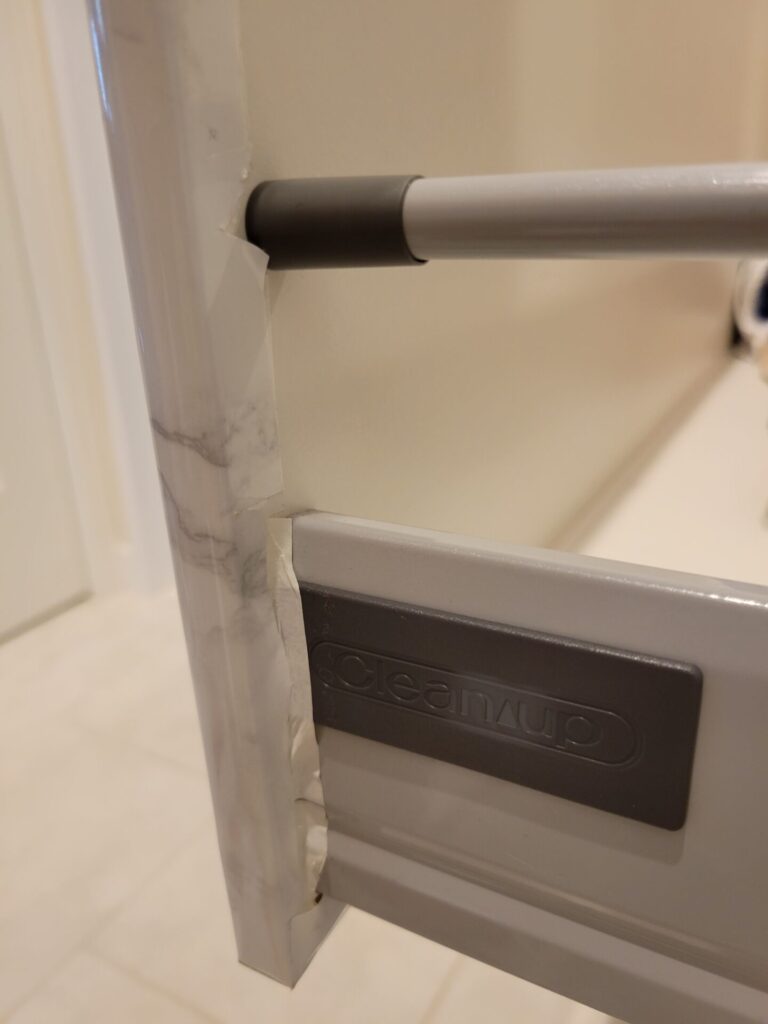
とは言っても、細かいところは適当に貼ってしまいました。
見えないところは気にしない主義です(笑)
取っ手を付けて完成!

事前に取っ手を当ててみて、ネジ穴の箇所にペンで印を付けます。
そこにキリで穴を開けてからドライバーでネジを回すとスムーズにできます。
今回は、初めに付いていた取っ手と、新しく購入した取っ手の横幅が違ったので新たにネジ穴を開けるのに少し苦労しました。
電動ドライバーがあれば簡単にできますね!
タイプ別|おすすめのリメイクアイディア
ここからは、タイプ別にリメイクのアイディアをご紹介していきます。
ねこどんな洗面台にしようかな〜?
モノトーン
まずはお好きな方も多いモノトーンインテリア。
ブラック・ホワイト・グレーで統一すると、かっこよく引き締まった空間になりますね。
無地のリメイクシートなら、柄合わせも必要なく気軽に貼ることができそうです。
タイル調
お次は、おしゃれなタイル調です。
定番のスクエアや、ヘキサゴンタイルなども個性的な空間になりおすすめです。
本物のタイルは目地が汚れやすく掃除が面倒ですが、リメイクシートならそんな心配もありません♬
ストーン調

私も今回選んだのが大理石のようなストーン調。
しっかりとした素材を選ぶととても高級感がありますよ!
カラーもホワイト系やブラック系・ベージュ系など種類も豊富です。
コンクリート調
そしてこちらはコンクリート調。
洗面台としては珍しいデザインになるかもしれませんが、男前インテリア好きさんにおすすめでかっこよくなりそうです。
ブラックのアイアンバーなんかを合わせるとさらに際立ちますね。
木目調
そしてこちらは定番の木目調です。
今は無地の洗面台を使っているけどリメイクしたいという方や、今も木目調だけど色を変えてみたいという方におすすめです。
一言で木目調と言っても、白っぽい色や濃い色まで幅広いので印象がガラッと変わりそうですよね。
どのタイプが好みでしたか?
ここからは、取っ手のおすすめをご紹介します!
真鍮の取っ手

わが家でも使っている真鍮(しんちゅう)の取っ手ですが、高級感が出るのでお部屋を素敵な空間にしてくれます。
初めはピカピカしていますが、使うほどに味わいが出てそれもまた素敵ですよ。
真鍮の取っ手はお気に入りでキッチンのカップボードにも使っています。
詳しくはこちらから
アイアンの取っ手
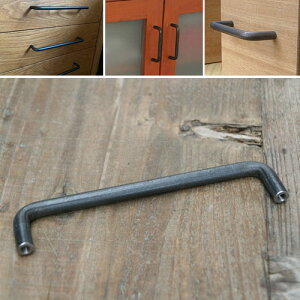
お次は、アイアン製の取っ手です。
ブラックのアイアンは一気にかっこいい空間にしてくれますね!
どんな素材にも合いそうです。
【飾り付き】取っ手

そして最後は可愛い飾り付きのタイプ。
小さい引き出しなどにおすすめです。
非常にたくさんの種類があり見てるだけで楽しくなるので、ぜひお気に入りを探してみてくださいね♬
まとめ|リメイクシートで洗面台をおしゃれにDIY
今回は、わが家の洗面台リメイクの実例や、おすすめのリメイクシート・取っ手のご紹介をしました。
DIYしたいスタイルは決まりましたか?
既製品にはない色々な組み合わせが選べるのもDIYの魅力ですよね!
ねこ古い洗面台もリメイクで生まれ変わるね♬
もう一度リメイクシートや取っ手の種類を見たい方は、右側の目次からお好きなところに戻れます。
ぜひリメイクシートで素敵なDIYをしてみてくださいね♬
この記事がお役に立てれば嬉しいです。
最後までご覧いただきありがとうございました!
にほんブログ村


